Object detection and pose estimation on mobile with YOLOv8
Learn how to build and run ONNX models on mobile with built-in pre and post processing for object detection and pose estimation.
Contents
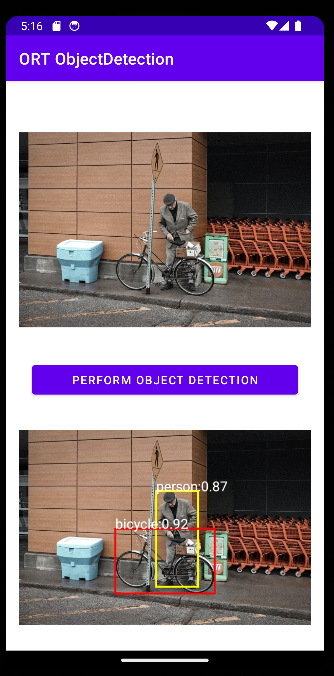
Object detection with YOLOv8
You can find the full source code for the Android app in the ONNX Runtime inference examples repository.
Build the ONNX model with built-in pre and post processing
This step is optional as the model is available in the examples repository in the applications folders above. If you are interested, the following steps show you how to build the model yourself.
Create a Python environment and install the following packages.
pip install --upgrade onnx onnxruntime onnxruntime-extensions pillow
Download the following script to build the model.
curl https://raw.githubusercontent.com/microsoft/onnxruntime-extensions/main/tutorials/yolo_e2e.py > yolo_e2e.py
Run the script.
python yolo_e2e.py [--test_image <image to test on>]
After the script has run, you will see one PyTorch model and two ONNX models:
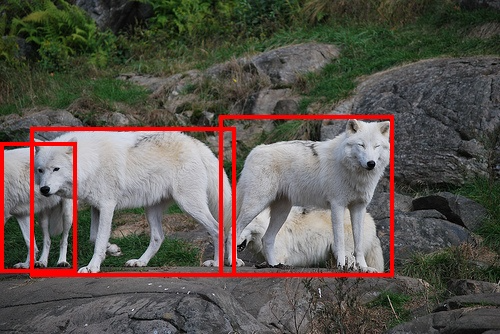
yolov8n.pt: The original YOLOv8 PyTorch modelyolov8n.onnx: The exported YOLOv8 ONNX modelyolov8n.with_pre_post_processing.onnx: The ONNX model with pre and post processing included in the model<test image>.out.jpg: Your test image with bounding boxes supplied.
For example, the wolves test image in the extensions repo:

Build an Android application
Load the Android application into Android Developer Studio.
You see the main inference code in ObjectDetector.kt. It’s as simple as loading the image image into byte array, and running it through the model with ONNX Runtime to get the original image with boxes.
    fun detect(inputStream: InputStream, ortEnv: OrtEnvironment, ortSession: OrtSession): Result {
        // Step 1: convert image into byte array (raw image bytes)
        val rawImageBytes = inputStream.readBytes()

        // Step 2: get the shape of the byte array and make ort tensor
        val shape = longArrayOf(rawImageBytes.size.toLong())

        val inputTensor = OnnxTensor.createTensor(
            ortEnv,
            ByteBuffer.wrap(rawImageBytes),
            shape,
            OnnxJavaType.UINT8
        )
        inputTensor.use {
            // Step 3: call ort inferenceSession run
            val output = ortSession.run(Collections.singletonMap("image", inputTensor),
                setOf("image_out","scaled_box_out_next")
            )

            // Step 4: output analysis
            output.use {
                val rawOutput = (output?.get(0)?.value) as ByteArray
                val boxOutput = (output?.get(1)?.value) as Array<FloatArray>
                val outputImageBitmap = byteArrayToBitmap(rawOutput)

                // Step 5: set output result
                var result = Result(outputImageBitmap,boxOutput)
                return result
            }
        }
    }

Pose estimation with YOLOv8
Build the pose estimation model
Note: this part of the tutorial uses Python. Android and iOS samples are coming soon!
Create a Python environment and install the following packages.
pip install --upgrade onnx onnxruntime onnxruntime-extensions pillow
Download the following script to build the model.
curl https://raw.githubusercontent.com/microsoft/onnxruntime-extensions/main/tutorials/yolov8_pose_e2e.py > yolov8_pose_e2e.py
Run the script.
python yolov8_pose_e2e.py
After the script has run, you will see one PyTorch model and two ONNX models:
yolov8n-pose.pt: The original YOLOv8 PyTorch modelyolov8n-pose.onnx: The exported YOLOv8 ONNX modelyolov8n-pose.with_pre_post_processing.onnx: The ONNX model with pre and post processing included in the model
Run examples of pose estimation
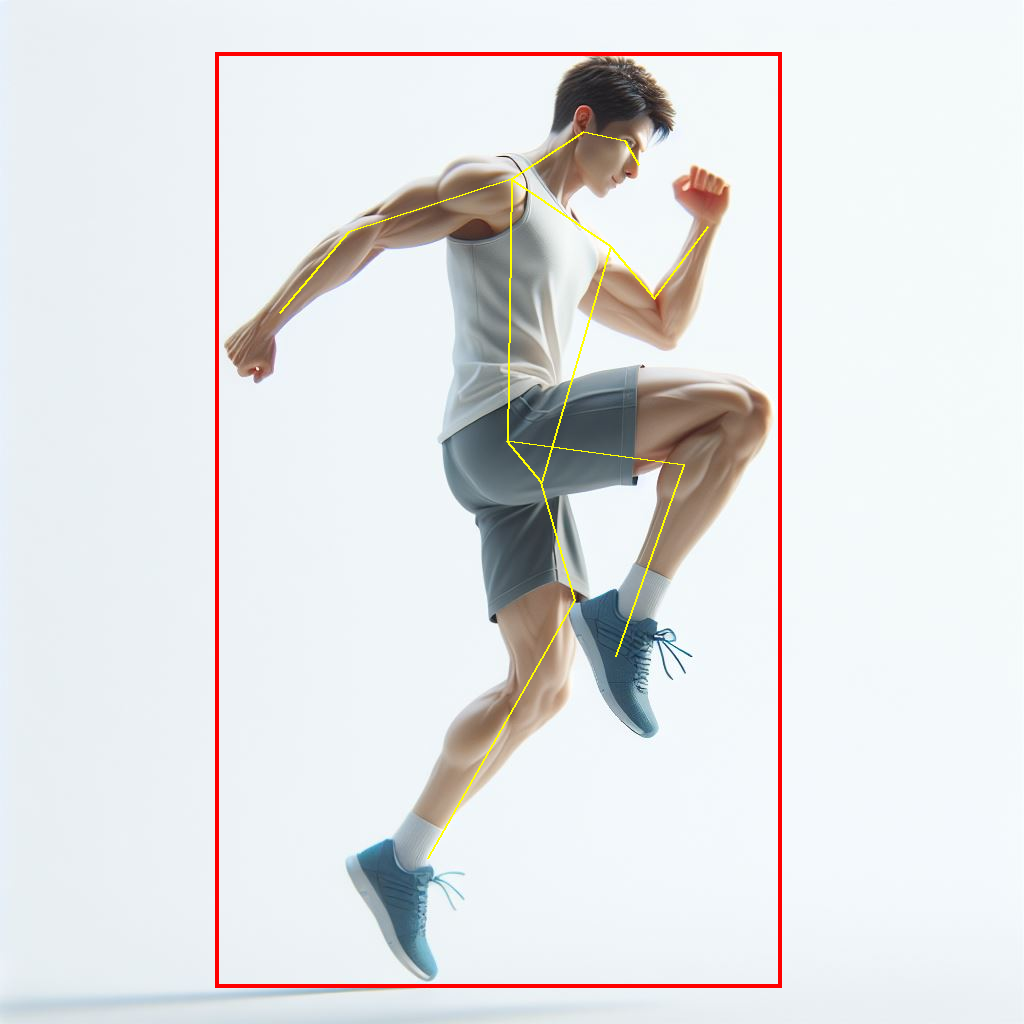
You can use the same script to run the model, supplying your own image to detect poses.
python yolov8_pose_e2e.py --test_image person.jpg --run_model
And the output is drawn on the original image!

Develop your mobile application
You can use the Python inference code as a basis for developing your mobile application.
Additional resources
ONNX Runtime examples repository ONNX Runtime extentions repository